01 폴더 생성
C:\LAB\winxp
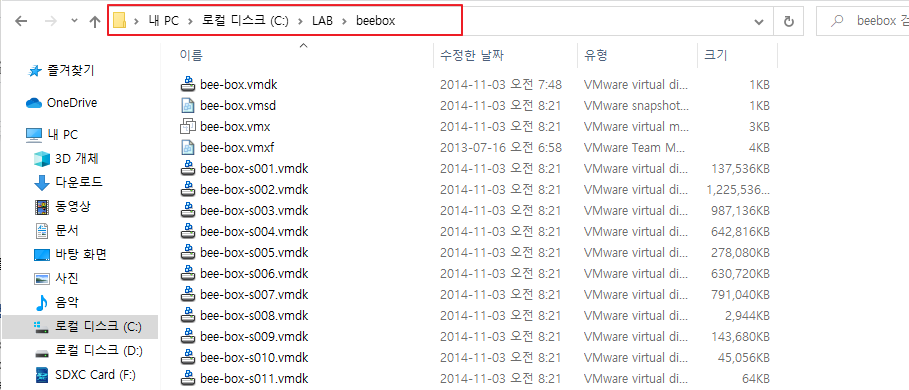
C:\LAB\beebox
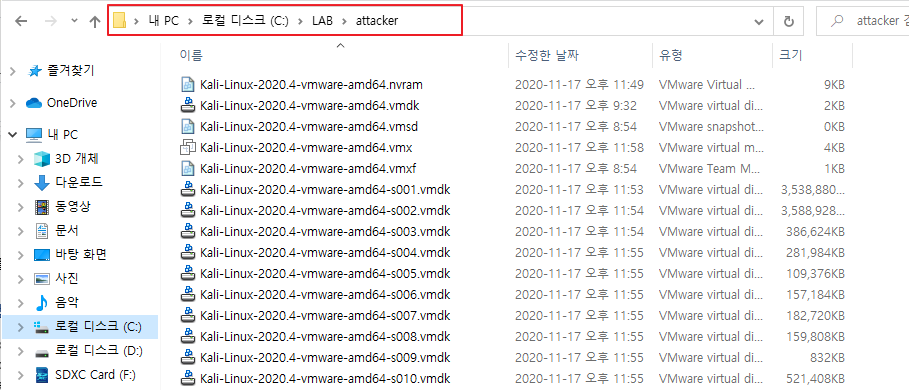
C:\LAB\attacker
02 VMware Workstation Player 다운로드 및 설치
https://www.vmware.com/kr/products/workstation-player/workstation-player-evaluation.html
* VMware Workstation Pro가 설치되어 있으면 생략해도 됩니다.
03 가상머신 이미지 및 실습 파일 다운로드
https://kali.download/virtual-images/kali-2021.3/kali-linux-2021.3-vmware-amd64.7z
https://drive.google.com/file/d/0B6O3fRoAooHJUnNITkg1QzhtTFE/view?usp=sharing
https://sourceforge.net/projects/bwapp/files/bee-box/bee-box_v1.6.7z/download
https://drive.google.com/file/d/0B6O3fRoAooHJeU1OT2kwdjVPS0U/view?usp=sharing
04 다운로드 받은 가상머신 이미지를 압축 해제
04-1 WindowsXP.zip 파일의 [VM - WindowsXP] 폴더 내용을 C:\LAB\winxp 폴더로 압축 해제

04-2 bee-box_v1.6.7z 파일의 [bee-box] 폴더 내용을 C:\LAB\beebox 폴더로 압축 해제
04-3 kali-linux-2020.4-vmware-amd64.7z 파일의 [Kali-Linux-2020.4-vmware-amd64.vmwarevm] 폴더 내용을 C:\LAB\attacker 폴더로 압축 해제
05 VMware Workstation Player에 WindowsXP 이미지를 추가
05-1 VMware Workstation Player를 실행
05-2 Open a Virtual Machine 클릭

05-3 압축 해제한 WindowsXP 이미지를 선택 (C:\LAB\winxp\SecureCoding Client.vmx)

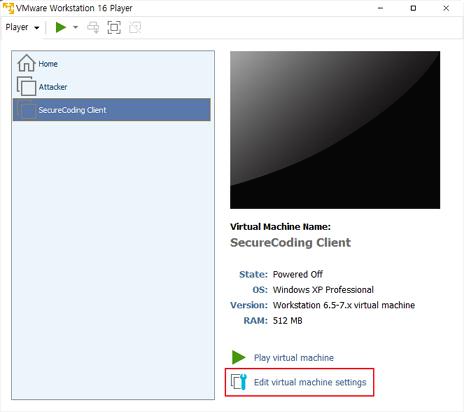
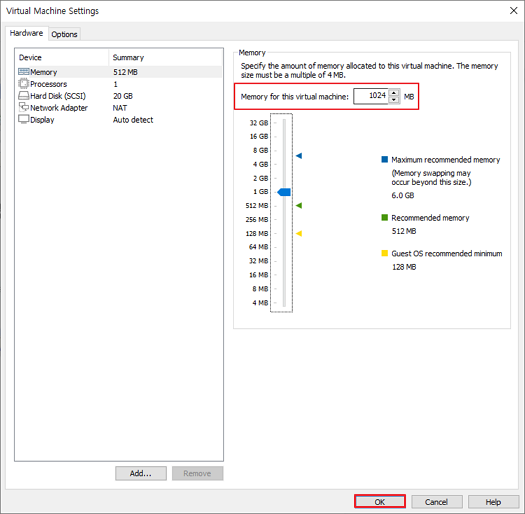
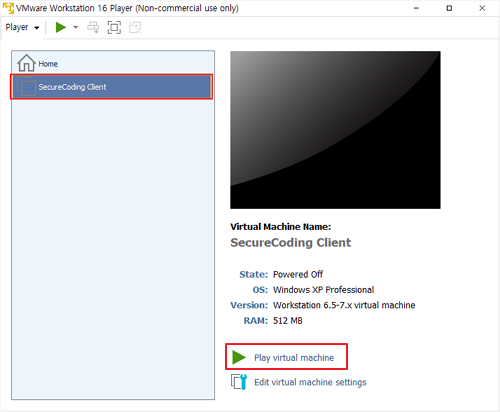
05-4 SecureCoding Client 선택 후 Edit virtual machine settings 클릭 ⇒ Memory를 1G(1024MB)로 변경
05-5 SecureCoding Client 선택 후 Play virtual machine 클릭
05-6 Administrator 계정(패스워드: 0sook (숫자 0, 영문자 sook))으로 로그인

05-7 03 단계에서 다운로드 받은 SecureCoding_20160918.exe 파일을 WindowsXP 가상머신의 바탕화면으로 Drag & Drop
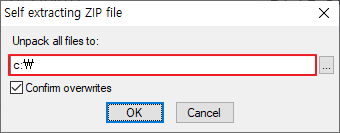
05-8 바탕화면의 SecureCoding_20160918.exe 파일을 실행 ⇒ 반드시 압축 해제 폴더를 "C:\"로 지정
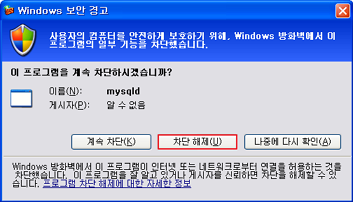
05-9 WindowsXP C:\SecureCoding\start_securecoding.bat 실행 ⇒ 이클립스 실행 확인
05-10 Tomcat 서버 구동 및 실행 확인
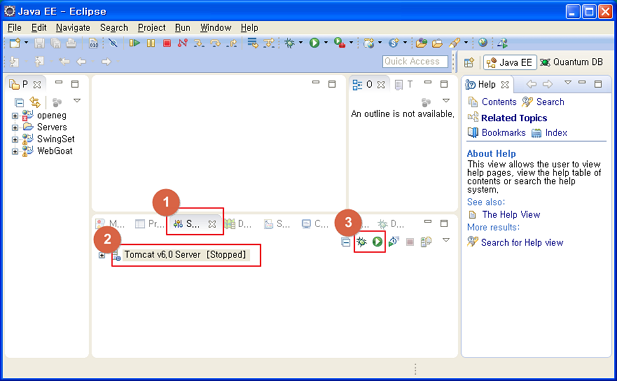
Servers 탭 클릭 → Tomcat v6.0 Server 선택 → 벌레 모양 아이콘(Start the server in debug mode) 클릭
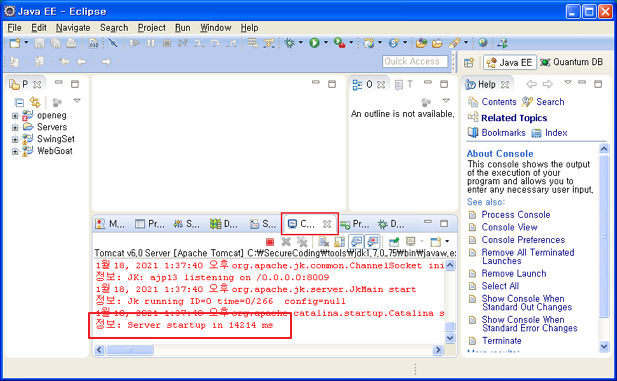
Console 탭 클릭 → Server startup 메시지 확인
05-11 IE 브라우저로 openeg 사이트 및 WebGoat 사이트 접속 확인
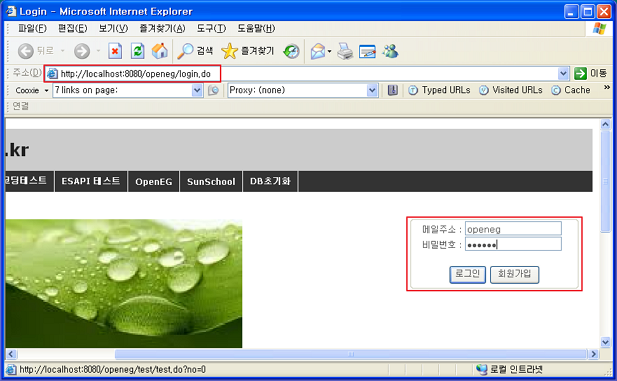
- http://localhost:8080/openeg
- 메일주소: admin
- 비밀번호: openeg
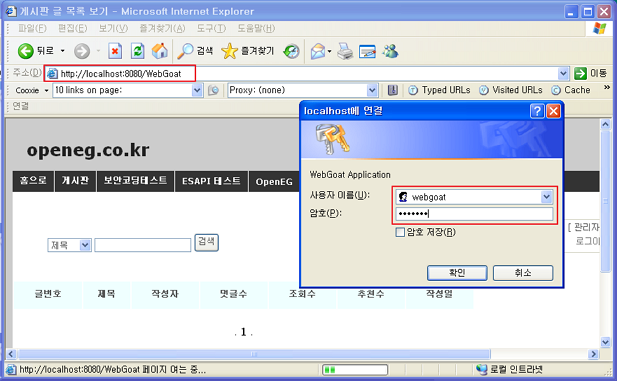
- http://localhost:8080/WebGoat
- 사용자 이름: webgoat
- 암호: webgoat
06 VMware Workstation Player에 Kali Linux 이미지를 추가
06-1 VMware Workstation Player를 실행
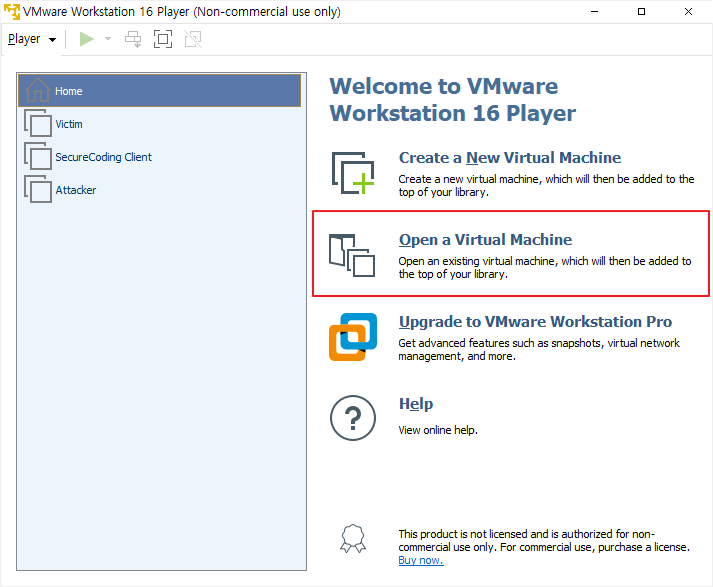
06-2 Open a Virtual Machine 클릭
06-3 압축 해제한 Kali Linux 이미지를 선택 (c:\LAB\attacker\Kali-Linux-2020.4-vmware-amd64.vmx)
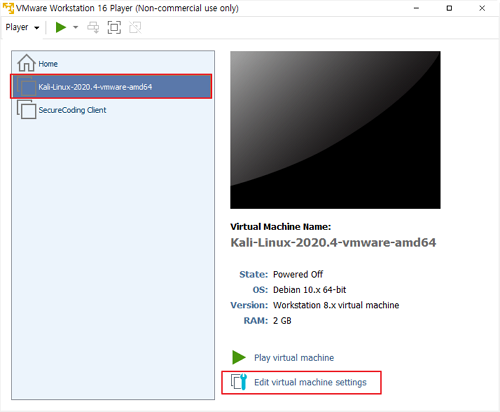
06-4 Kali-Linux-* 이미지 선택 후 Edit virtual machine settings 클릭
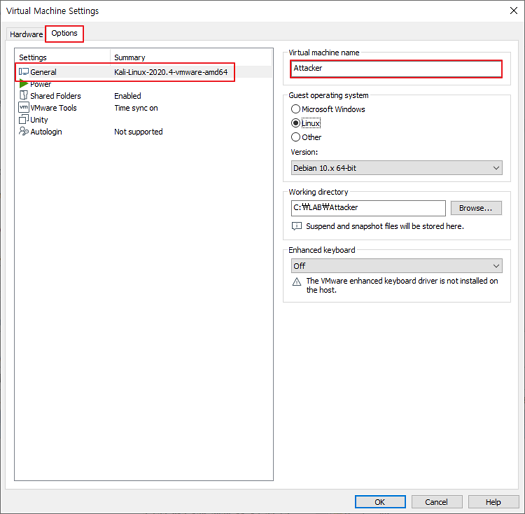
06-5 Virtual machine name 변경
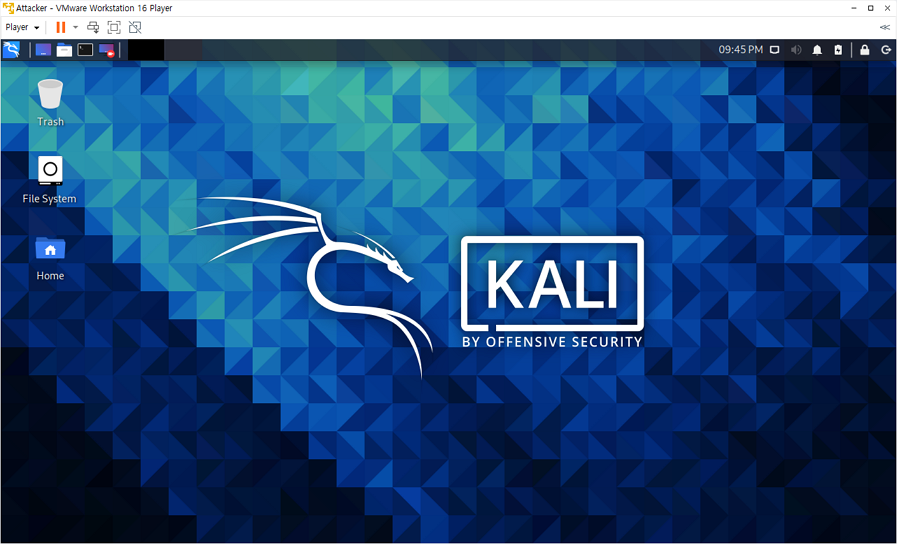
06-6 Attacker 선택 후 Play virtual machine 클릭
06-7 kali / kali 계정으로 로그인
07 VMware Workstation Player에 Bee-Box 이미지를 추가
07-1 VMware Workstation Player를 실행
07-2 Open a Virtual Machine 클릭
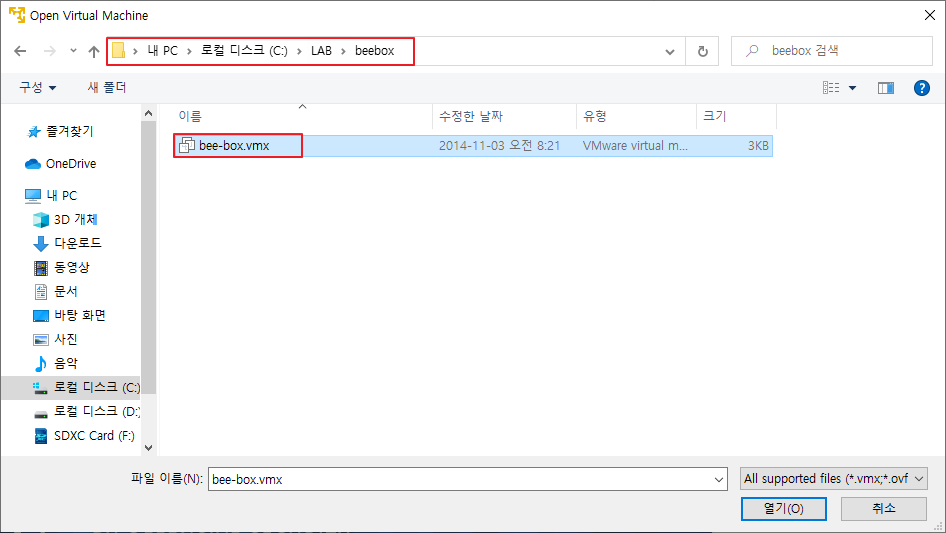
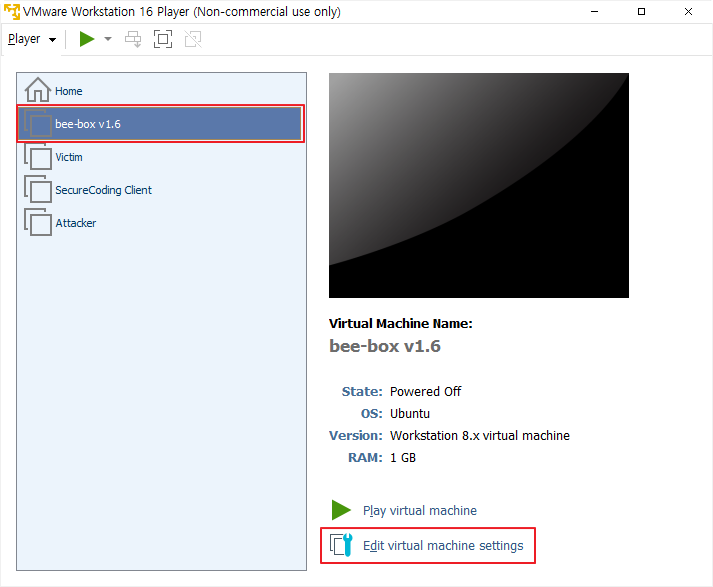
07-3 압축 해제한 Bee-Box 이미지를 선택 (c:\LAB\beebox\bee-box.vmx)
07-4 가상머신의 네트워크 종류를 Bridge에서 NAT로 변경

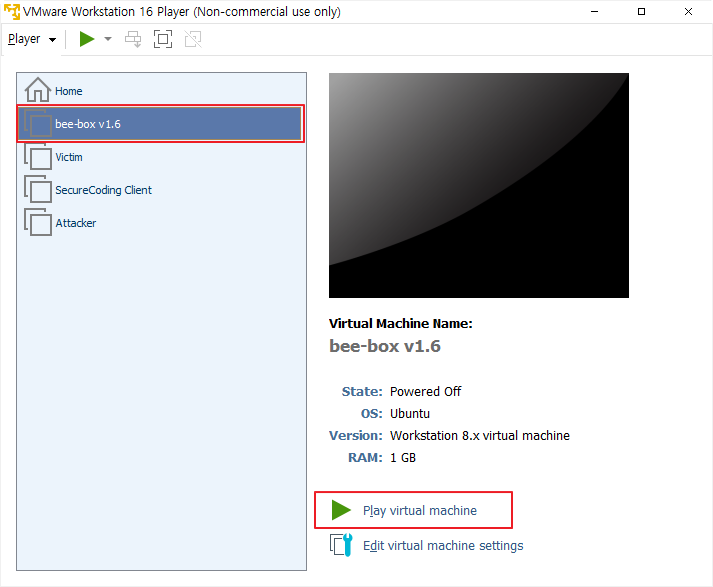
07-5 bee-box 가상머신 실행
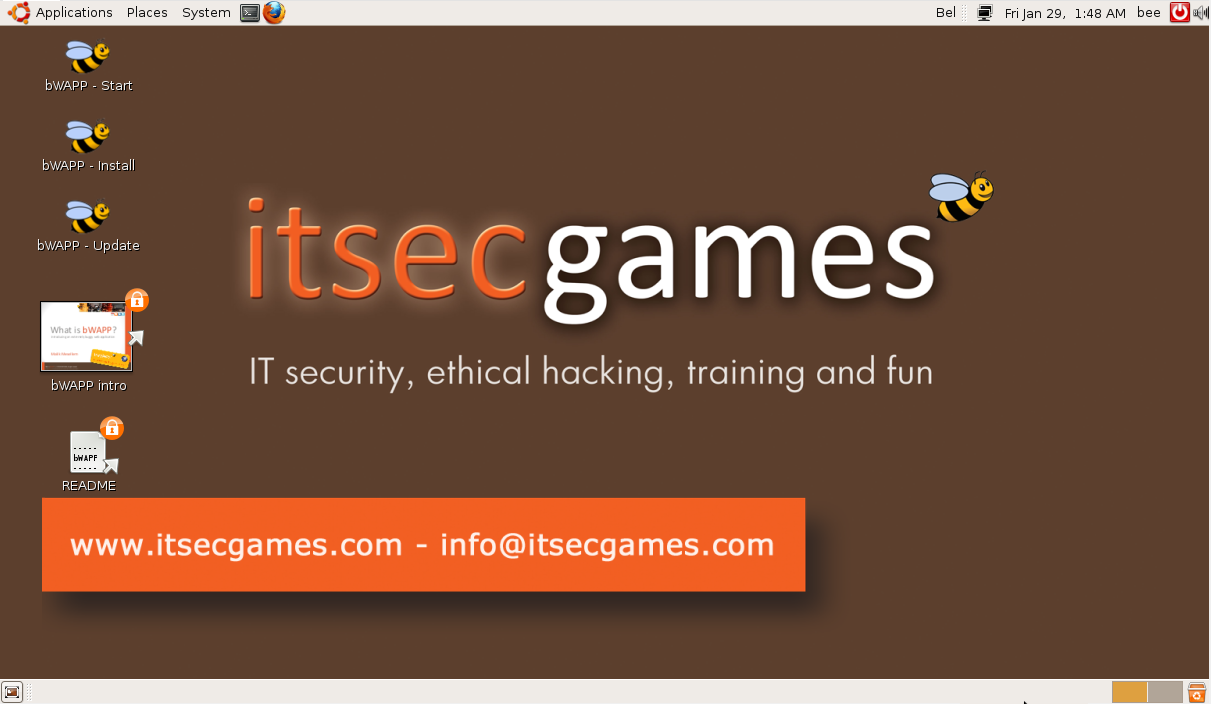
07-6 가상머신 실행 확인
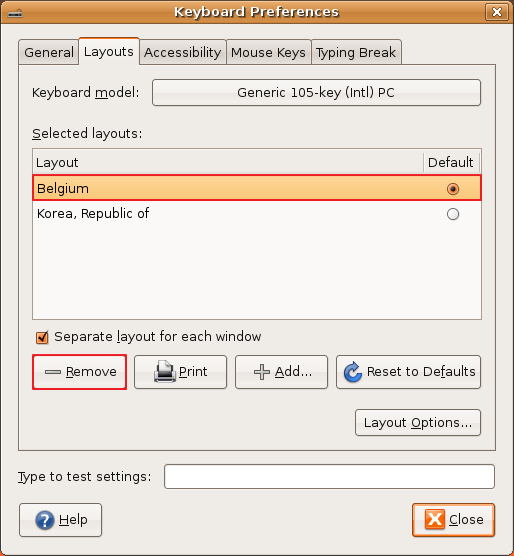
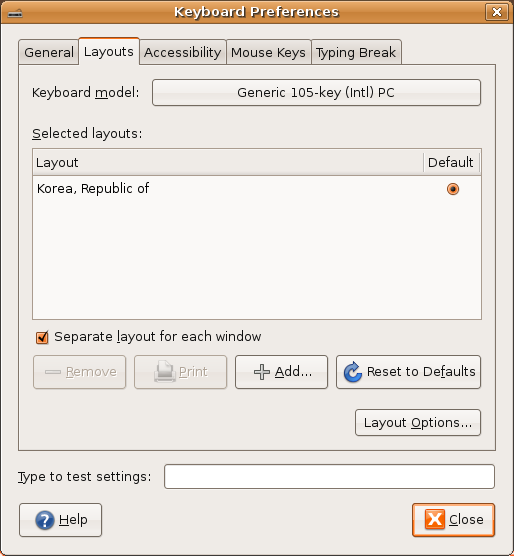
07-7 키보드 변경
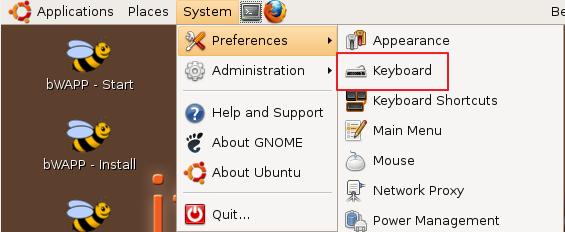
한글 키보드 추가
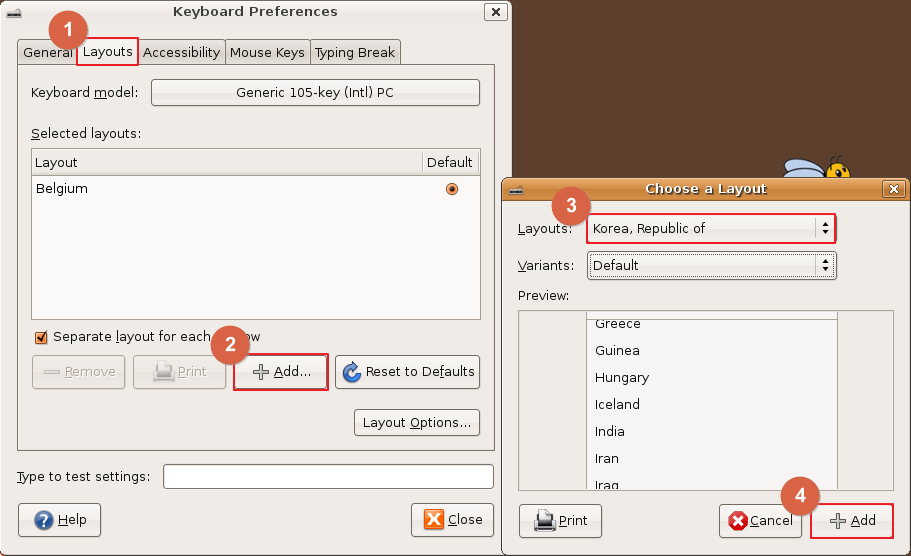
Belgium 키보드 삭제
08 각 가상머신의 IP 확인
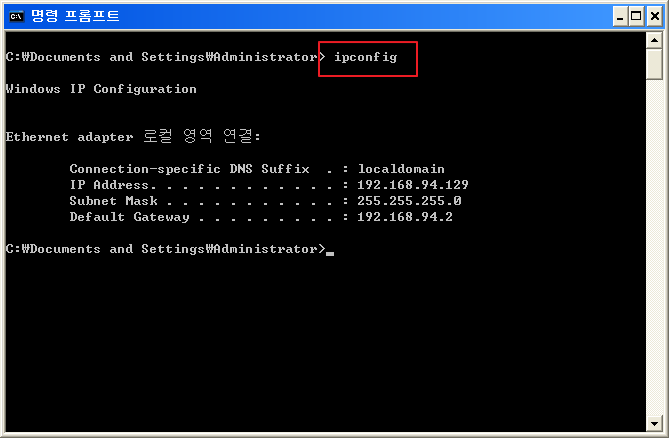
08-1 winxp (Windows XP)
> ipconfig
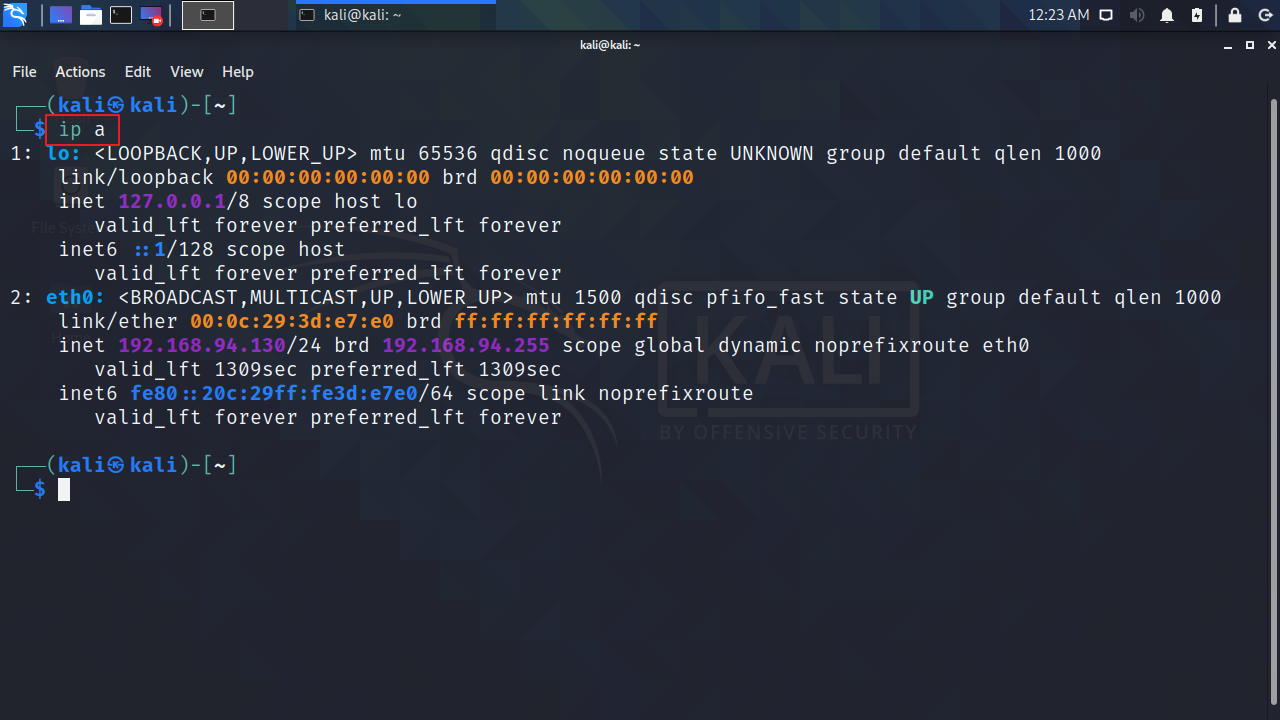
08-2 attacker (Kali Linux)
$ ip a
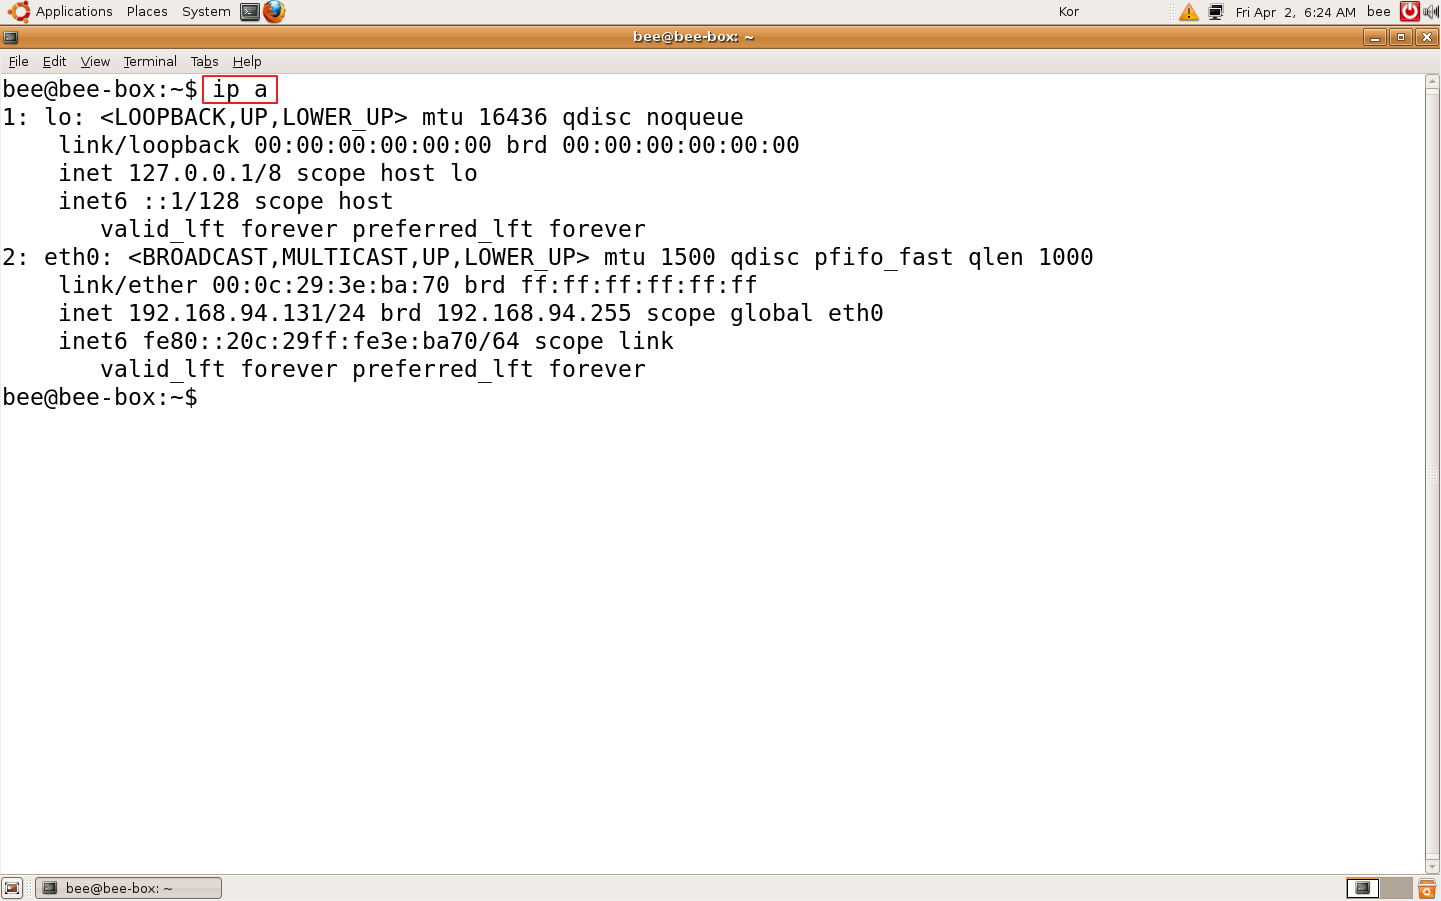
08-3 bee-box (Bee-Box)
$ ip a
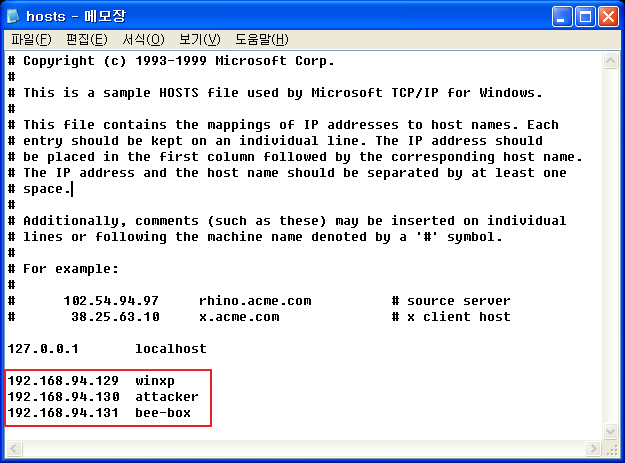
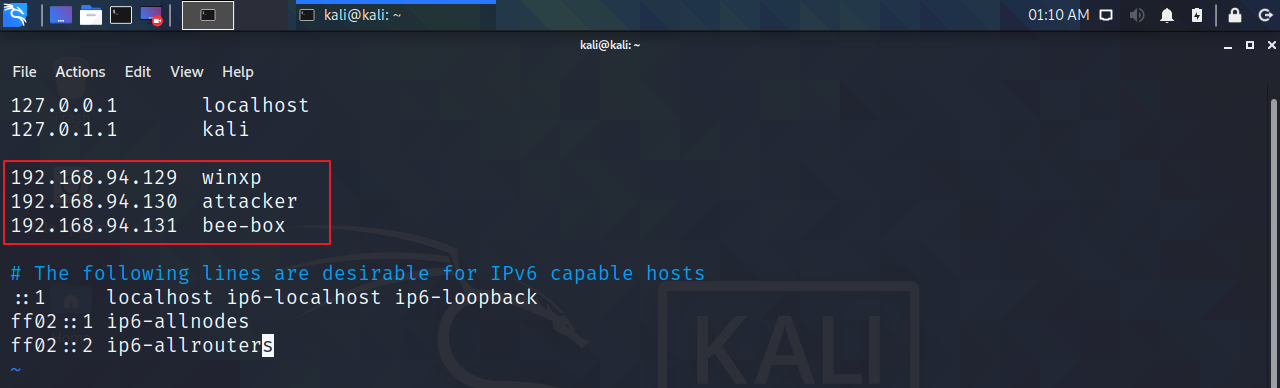
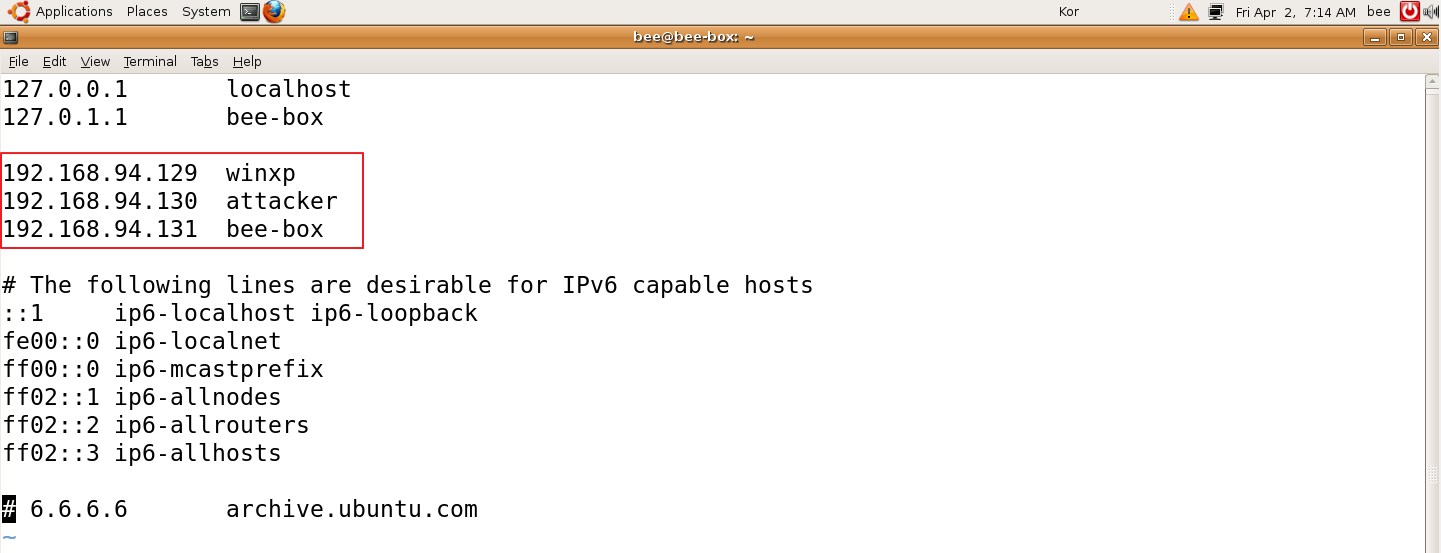
09 각 가상머신의 hosts 파일에 가상머신 등록
09-1 winxp (Windows XP)
C:\Documents and Settings\Administrator> notepad c:\WINDOWS\system32\drivers\etc\hosts
09-2 attacker (Kali Linux)
┌──(kali㉿kali)-[~]
└─$ sudo vi /etc/hosts
We trust you have received the usual lecture from the local System
Administrator. It usually boils down to these three things:
#1) Respect the privacy of others.
#2) Think before you type.
#3) With great power comes great responsibility.
[sudo] password for kali: kali
09-3 bee-box (Bee-Box)
bee@bee-box:~$ sudo gedit /etc/hosts
[sudo] password for bee: bug
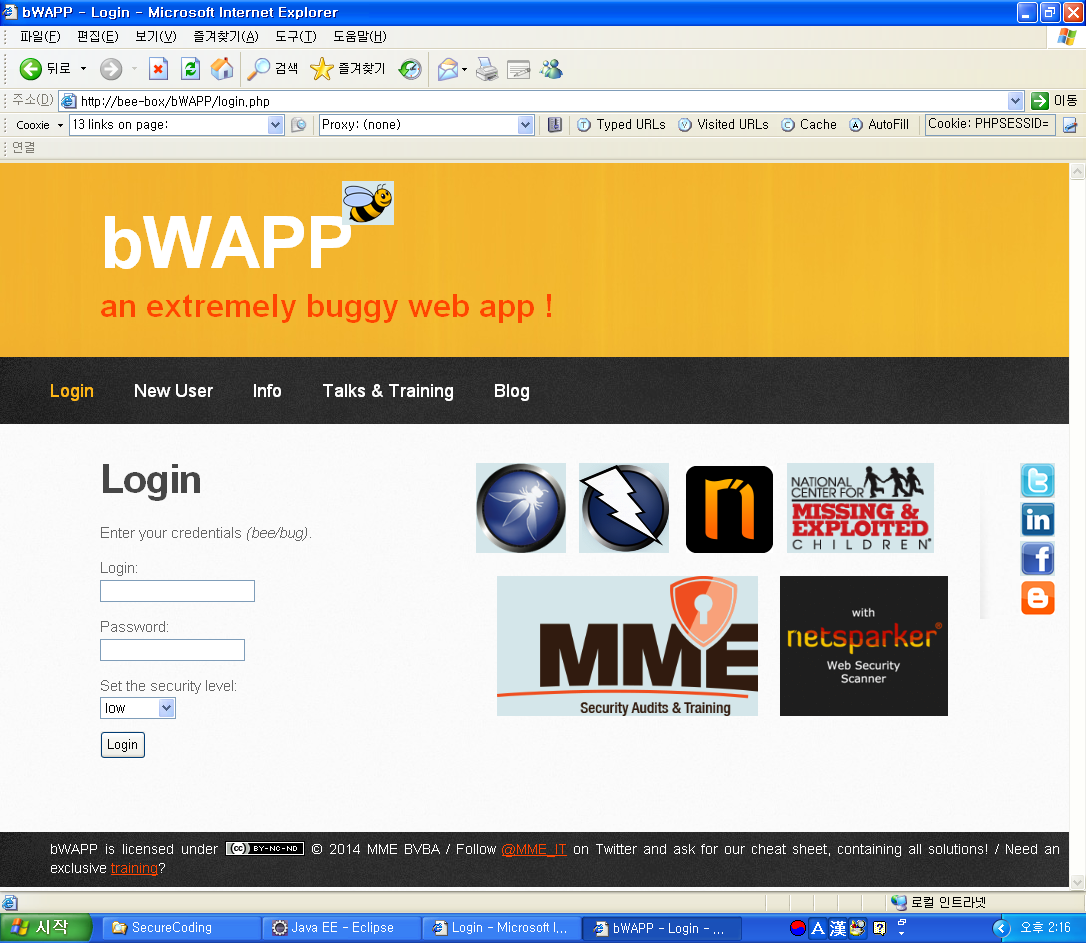
10 접속 테스트
10-1 @winxp
http://bee-box/bWAPP/login.php ⇒ bee / bug로 로그인 확인
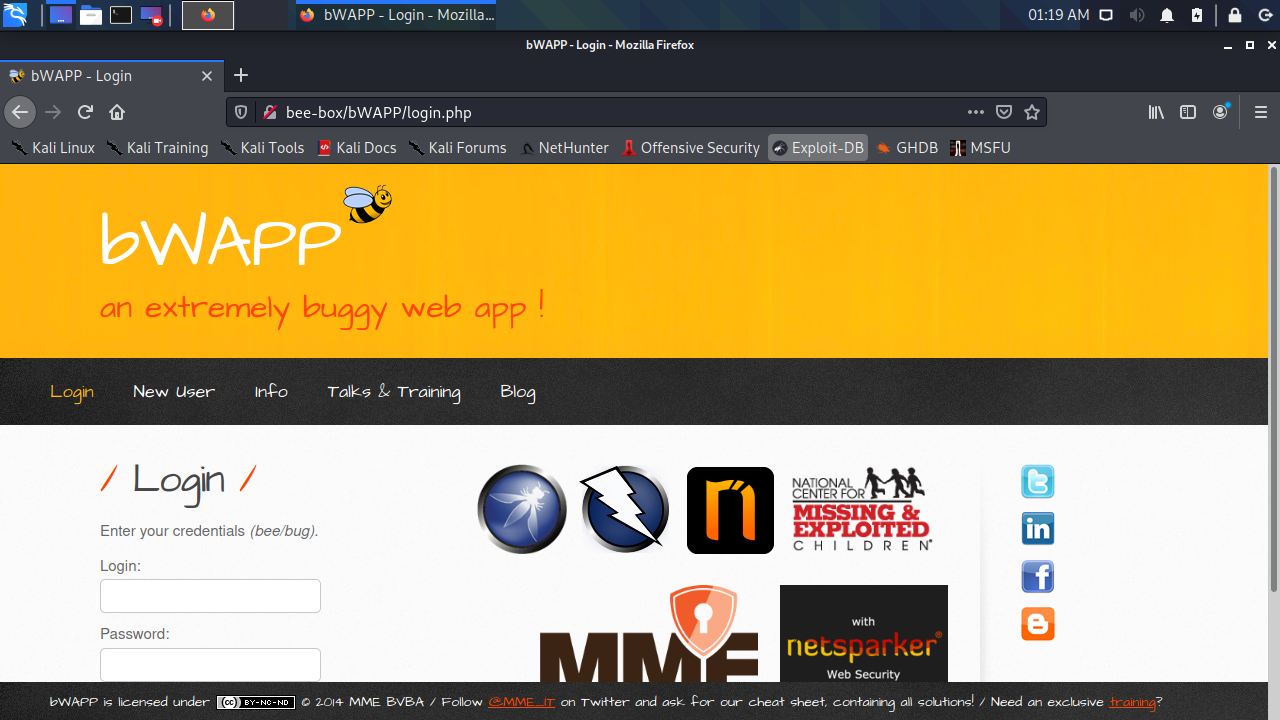
10-2 @attacker
http://bee-box/bWAPP/login.php ⇒ bee / bug로 로그인 확인
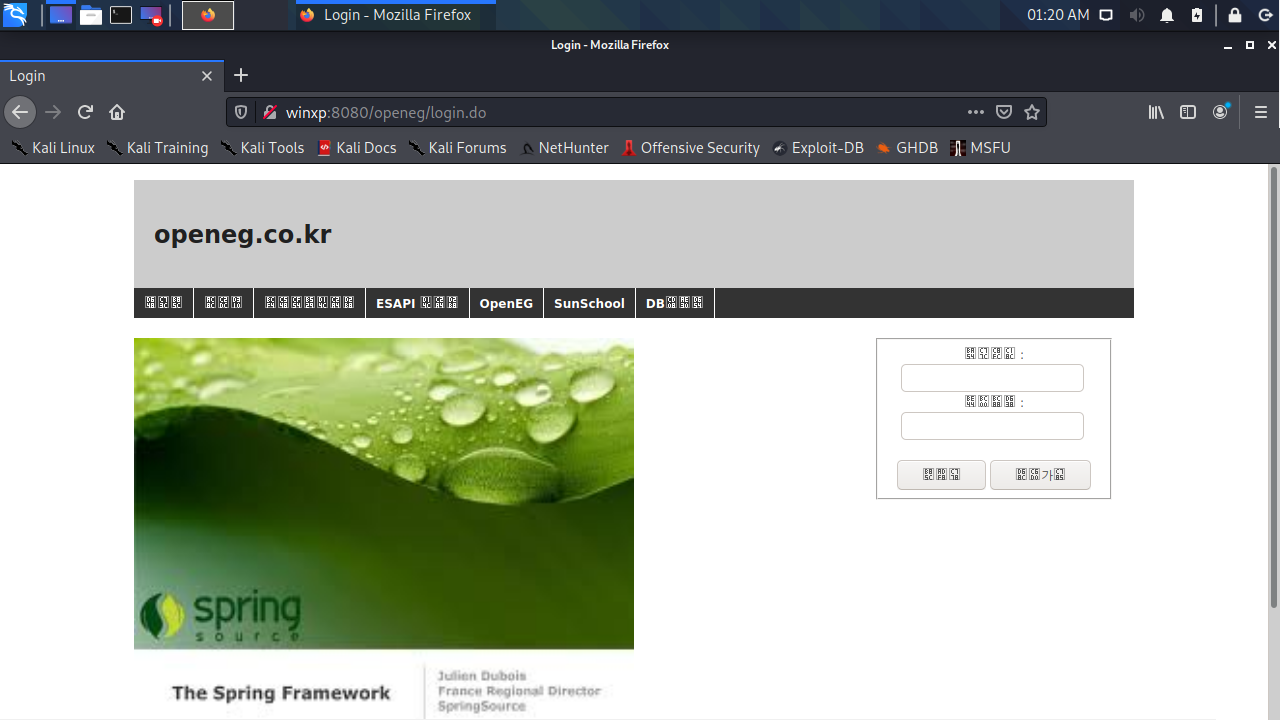
http://winxp:8080/openeg/login.do ⇒ admin / openeg로 로그인
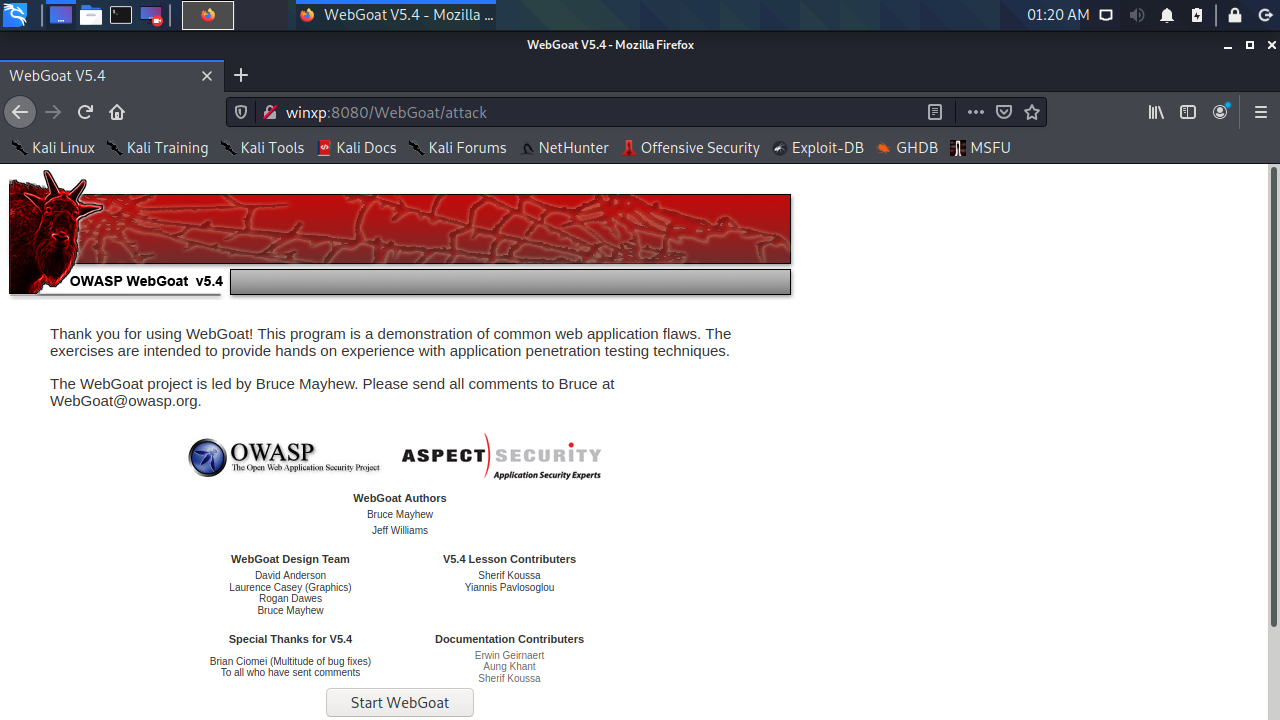
http://winxp:8080/WebGoat ⇒ webgoat / webgoat으로 로그인
기타 - Kali Linux 한글 설정
https://myanjini.tistory.com/entry/Kali-Linux-%ED%95%9C%EA%B8%80-%EC%84%A4%EC%A0%95
댓글